How to Maintain Your Drum Kit
Maintaining a drumset is a simple thing, assuming you do it regularly. Proper maintenance will keep it looking new and sounding great.
The drum should not be kept by direct heat as this could dry and crack the wood. Don¡¯t store it near a heater, in sunlight, or in the car (or boot). It is best to store it in a case or a cupboard when the weather gets hot; in very dry places you could leave a damp cloth with the drum to aid humidity. As the drum gets hotter, the skin tightens and can split or pull away from the pins holding it in place.
Always make sure that your nylon cymbal sleeves are fresh, as they tend to wear down, exposing the cymbal to raw metal. This allows for the cymbal to make small cracks appear around the hole of the cymbal. When it's time to stop the cymbal at the end of a song, rest the palm of your hand against the edge. It does the same thing as grabbing it and doesn't leave fingerprints! Using a pair of gloves will prevent fingerprinting when setting up.
Spray the cymbal with Windex, removing any surface grime. Then apply a proprietary brand of cymbal polish, concentrating on heavily tarnished or scuffed areas. Re-apply the polish to these areas. Remove the polish after an application. It may require 2-3 applications of polish to the entire surface of the cymbal. Use Windex to clean off any remaining polish. Making sure it is dry, apply the car wax. The wax helps deter fingerprints and doesn¡¯t alter the sound of the cymbal. It is best to use a car wax containing caranuba wax, that is solid or very pasty, and that is NOT a cleaner-wax. Apply the wax in the direction of the grooves, letting it dry to a haze, but not dry completely. Buff it off, and your set!
Paiste cymbals are coated with a special finish and any other cleaning methods other than soapy water or a Paiste brand cleaner, can damage them.
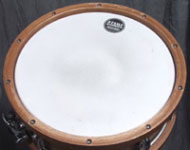
One of the most important things to do regularly is change the drum skins (heads). In time, the skin will eventually weaken where you strike it the most, causing the tension to change. A weaker skin is more likely to dent, or even puncture with harder hits. In addition, a weaker skin will have little rebound for your stick.
Most skins should be changed every six months. Some things to look for in skins are indents and cracks. If you have a lot of bumps in your skin, chances are it will sound out of tune and need changing. Stick marks are ok, as long as there is no damage. Make sure you are not digging a hole right where your beater hits on the bass drum head. Treat the outside of the skin regularly with a softener - lanolin-based creams are best. This helps keep the skin supple and in good condition.
Snare drum heads usually need to be changed twice as often as tom heads. Since most drummers play the snare harder and more often then the toms, this makes sense. A good way to tell if your snare head needs replacing is by pressing down in the middle of the snare. Check and see if it droops or is weaker there then around the rim. Another way is to take the snare off and hit the center of the drum. If it sounds muffled or short, chances are it is time to change it.
On snare drums always check that the snare-strainer throw-off assembly is lubricated and works smoothly. Also check the snares themselves for damage or bending.
Once the drum heads have been removed check the bearing edges for cracks in the shell or bearing edge deformities. It does no harm to take a candle and gently rub a bit of wax around the bearing edges to help smooth movement of the skin over the edge. ALWAYS ensure that all lumps of wax are removed before fitting the head.
Before you begin to play, rub a little bit of clear water into the back of the skin. This lets the skin stretch a little. If you are playing in a warm place the skin will tighten up again as you play, so you will probably need to do this more than once. If the skin has become a bit too damp and is very slack, it can be tightened by vigorous rubbing with the palm of your hand.
Chrome is found all over the drum set; tom mounts, lugs, stands, and rims are usually chrome plated. Chrome can be ruined by moisture so keeping your equipment dry is important. You should wipe down the chrome on your kit with a fluffy terry-cloth towel once a week, minimum. If you play somewhere cool or move your equipment from a cold car to a warm club, condensation may form on the metal parts of your drums. This should be wiped away immediately to prevent rust. If dirt, pitting, or rust builds up, you can use steel wool to clean it off. A metal polish can also be used on metal surfaces, excluding cymbals.
Simple dishwashing or hand washing soap and warm water will take any dirt right off the plastic wrap. Do not use anything abrasive such as steel wool or scouring pads. They will scratch the plastic. Check the exterior finish for deep scratches, evidence of cracks or other damage. Apply a coat of polish to the shells and fittings to maintain a good finish.
To loosen up the lugs, apply a small amount of lithium grease or Vaseline to the lug insert with a Q-Tip or toothpick and gently screw the tension rod into the lug.
Ensure that all threads work well and are lubricated using a proprietary brand or Vaseline. These should be checked regularly especially if the kit has been frequently used or exposed to moisture.
Always make sure that you carry a 'spares' supply of drum parts and the necessary tools e.g., spare drum key(s), spanner(s) and screwdriver(s)!
Ensure, wherever possible that your drums are cased. Hard cases generally give better protection, though they may need lining with a softer material to hold the drum more securely in its case and prevent scratching.